

How to Create & Customize Checkout Links
When creating a new custom checkout link, you’ll see a builder divided into three main tabs: Design, Behavior, and Integrate. Each tab gives you powerful tools to tailor the buying experience for your customers. Here is a breakdown of what every option does:1. The Interface Tab
This tab controls the visual appearance of your checkout page, you can set your checkout colors and control a wide variety of options :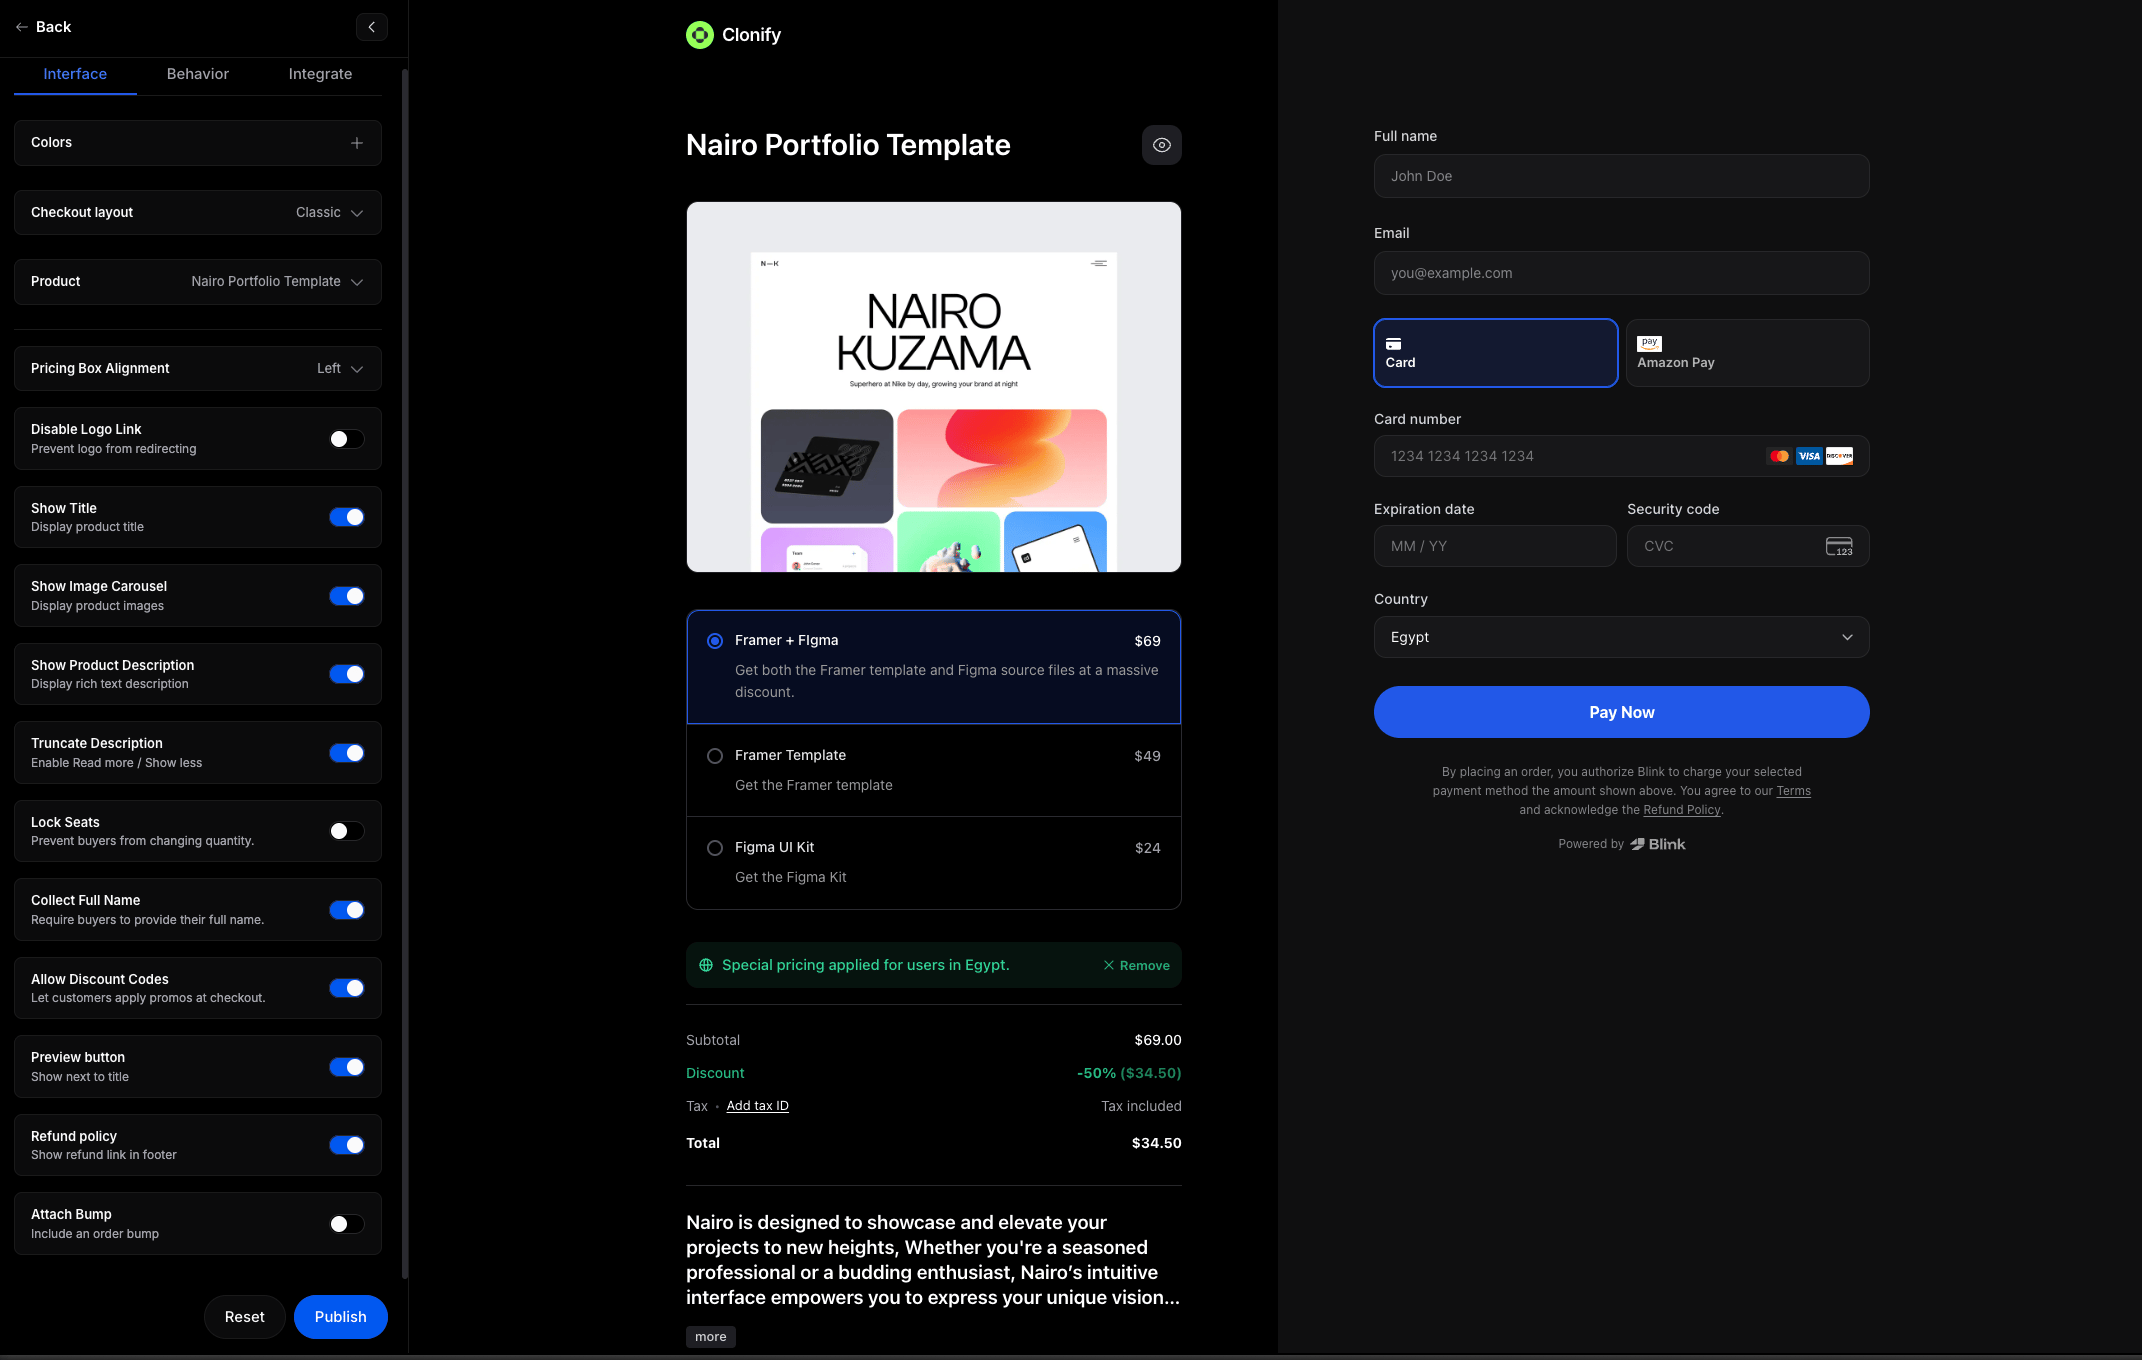
- Colors: Customize the color palette, primary accent colors, links, selections, theme and more.
- Checkout Layout: Select your preferred layout style: Classic and Overlay.
Overlay: - Product: Select which product you’d like to create a custom checkout to.
- Pricing box alignment: Switch the position of the pricing details between left and right columns.
- Disable Logo Link: Prevents buyers from clicking on your brand logo to navigate away from the checkout page.
- Show Title: Displays the main product title at the top of the checkout block.
- Show Image Carousel: Enables a media gallery/carousel to showcase your product preview images.
- Show Product Description: Displays the full rich-text description beneath the media preview.
- Truncate Description: Adds a “Read more / Show less” toggle to keep long product descriptions concise and clean.
- Lock Seats: Locks the item quantity, preventing buyers from increasing or decreasing the number of licenses/units at checkout.
- Collect Full Name: Requires customers to enter their full name alongside their email address before completing the purchase.
- Allow Discount Codes: Adds a coupon field allowing customers to apply promotional codes at checkout.
- Preview Button: Displays a quick-preview button next to the product title.
- Refund Policy: Includes a direct link to your refund policy in the checkout footer.
- Attach Bump: Enables an optional order bump offer (add-on product) directly inside the checkout flow.
2. The Behavior Tab
This tab controls what happens behind the scenes during and after the transaction.- Success URL: Enter a custom webpage URL here to automatically redirect customers after a successful purchase (e.g., a custom “Thank You” page on your website). Pro-tip: You can include
{CHECKOUT_ID}in the URL to pass the transaction ID to your page. - Return URL: Enter a URL where customers should be redirected if they click the back button or cancel the checkout process.
- Preset Discount: Want to send a link with a discount already applied? Enter the promo code here (e.g.,
FALL20). When customers open the link, the discount will be automatically applied to their total. - Lock Seats: Turn this on to lock the quantity field. This prevents buyers from accidentally (or intentionally) changing the number of items they are purchasing.
- Custom Metadata (JSON): For advanced users! Add hidden data (like tracking IDs, campaign names, or affiliate tags) in JSON format. This data will be attached to the order and sent via webhooks for your internal tracking.
3. The Integrate Tab
Once your checkout is designed and configured, this is where you grab the final product.- Select Product: Use the dropdown at the top of the sidebar to choose which product this link is for.
- Direct Link: Copy the final, unique URL. You can paste this link into your emails, social media bios, or attach it to a “Buy Now” button on your own website!